Fabric Scrap Organization: Sorting Scraps by Size and Color
Set a minimum scrap size, choose between a size system and a color system, and keep a small catch bin by the cutting mat. Includes bin limits and what to do with the overflow.
At a glance
What you need
- Three to eight clear bins, boxes or zip bags
- A cardboard square cut to your minimum size
- A small open catch bin
- A bag for overflow
- Blank labels for size bins
Scraps pile up for a good reason: the fabric was chosen with care, and the leftover corner still looks useful. The trouble starts when the corners go into a bag, the bag goes into a bigger bag, and using a scrap means tipping the whole lot onto the floor.
Good fabric scrap organization depends on three decisions made once: the smallest piece you will keep, whether you sort by size or by color, and how much room scraps are allowed to take. With those settled, each new offcut takes a few seconds to deal with.
Decide the smallest scrap worth keeping
Without a minimum size, every thread-thin sliver has to be considered on its own merits, and sorting never ends. Pick a size that matches what you actually make with scraps.
- You piece small patchwork or applique: keep anything that yields a 1.5 in (4 cm) square.
- You use scraps for larger patchwork, pouches or trims: keep anything that yields a 2.5 in (6.5 cm) square.
- You rarely sew from scraps: keep only pieces bigger than your hand, and release the rest.
Cut a square of cardboard to your minimum and keep it at the cutting table. If a scrap does not cover the card, it does not go in the bins. Anything of 1/4 yd (about 25 cm) or more is not a scrap at all; fold it and file it with your yardage, as described in the guide to storing fabric upright.
Pick one system: by size or by color
Both systems work. Mixing them, with some bins by size and some by color, is what fails, because every scrap then has two possible homes.
| System | Suits you if | Containers | Trade-off |
|---|---|---|---|
| By size | You sew from patterns that call for strips or set square sizes | Three or four shallow boxes or drawers | More trimming up front; colors are mixed |
| By color | You choose scraps by palette and cut to size when needed | Six to eight clear bins or zip bags | Fast to sort; mixed shapes need digging |
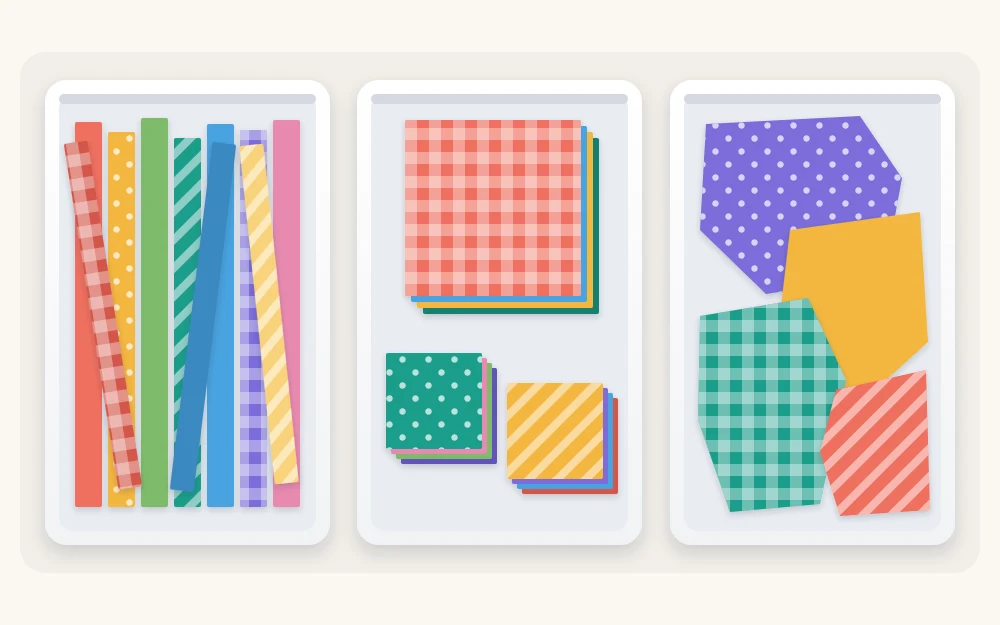
The size system
Use three groups, each in its own container:
- Strings and strips: long, narrow pieces. Lay them flat and straight in a long shallow box, or drape them over a hanger so they do not knot.
- Squares: scraps trimmed to one or two standard sizes, commonly 2.5 in and 5 in (12.5 cm). Stack each size in its own small box.
- Chunks: larger irregular pieces, roughly a hand span or more across. Fold them once and stand them on edge in a bin.
The color system
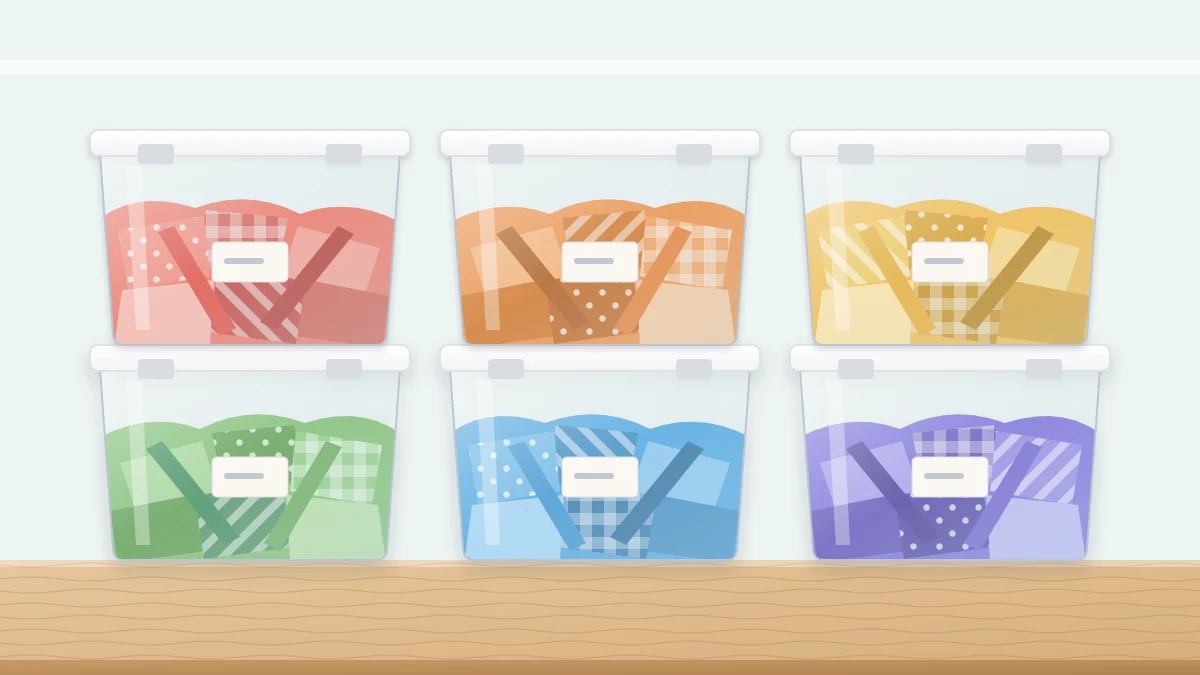
Give each color family a clear bin, drawer or large zip bag: red and pink, orange and yellow, green, blue, purple, and neutrals. Add a bin for multicolor prints if you own many. Clear containers matter here, because the color is the label. File a print by its background, and when a scrap could go in two bins, choose the first one you thought of and move on.
Sort the backlog in one session
Allow about an hour per grocery-bag of scraps, and stop when the time is up rather than when you are tired.
- Set out your containers and prop the minimum-size card where you can see it.
- Take one handful at a time. Never tip the whole bag out; a mountain is discouraging and sheds lint everywhere.
- Check each piece against the card. Too small goes straight into an overflow bag.
- Drop every keeper into its size or color container without trimming or pressing it. Trimming a backlog is a separate job for another day.
- When a container is full, stop adding to it. Extra pieces of that group go into the overflow bag too.
Tip
Tangled, wrinkled scraps take up roughly twice the room of flat ones. Smooth each piece with your hand as you place it, and the same bins hold far more.
Trim as you go, with a catch bin by the cutting area
New scraps are easiest to handle at the moment they are made. Keep one small open container, about the size of a loaf pan, next to your cutting mat. Offcuts land there during a project instead of on the floor.
When the project ends, or when the catch bin is full, empty it:
- Pieces under the minimum go to the overflow bag.
- In the size system, square up ragged edges and cut the piece to the largest standard size it allows.
- In the color system, just drop each piece into its color.
This takes about five minutes while the cutting tools are already out. When you finish, close the guard on the rotary cutter, or retract its blade, before you set it down, and store scissors closed in their usual home.
Set a limit per bin and plan for overflow
The container is the limit. A scrap bin is full when the lid closes without pressing, or when a drawer slides shut without catching. Past that point, something leaves before something enters. The broader guide to decluttering craft supplies explains why a container limit is easier to keep than a promise to yourself.
Overflow has several good destinations:
- Pass it on. Quilting groups, school art rooms and craft swaps often welcome sorted scraps. Ask first, and bag them by color so they are easy to accept.
- Donate. Some charity shops and textile recycling points take clean fabric offcuts; check what your local one accepts.
- Use as stuffing. Snip the smallest cotton pieces into a bag and use them to fill pincushions, draft stoppers or pet beds.
Keep the sorting quick
A scrap system should cost minutes, not evenings. Three habits keep it that way:
- No ironing to store. Press a scrap when you use it, not when you file it.
- No sub-sorting. Light blue and navy share a bin. Finer divisions slow down every future sort.
- Empty the catch bin on a trigger, such as the end of each project, so it never becomes a second backlog.
If you also keep paper offcuts, the same keep rule and container limit apply; see the companion system for paper scrap storage.
Adapting to a small or large scrap stash
Small: one shoebox with three zip bags inside (strips, squares, chunks) or three color groups: warm, cool and neutral.
Large: keep the color system, and inside the two or three busiest colors add a single divider separating strips from everything else. Review the bins about twice a year and release whatever you have passed over each time.
Frequently asked questions
What is the smallest fabric scrap worth keeping?
It depends on what you make. Many quilters keep anything that yields a 1.5 inch square, while people who sew pouches or larger patchwork set the line at 2.5 inches. Choose one size, cut a cardboard gauge to match and apply it to every piece so the decision is never made twice.
Is it better to sort fabric scraps by color or by size?
Sort by size if your patterns call for strips or standard squares and you do not mind trimming. Sort by color if you pick scraps by palette and cut when needed. Color is faster to maintain, size is faster to sew from. Either works as long as you use only one.
How do I stop fabric scraps from taking over the sewing room?
Give scraps a fixed number of containers and treat a full container as the limit. Keep a small catch bin beside the cutting mat, empty it at the end of each project, and send anything that does not fit to a swap, a donation point or the stuffing bag.