Craft Tool Organization: Keep Everyday Tools Within Reach
Stop hunting for scissors and rulers. Sort craft tools by how often you use them, give each one a single obvious home in a caddy, drawer, wall panel or labeled box, and keep cords in one bin.
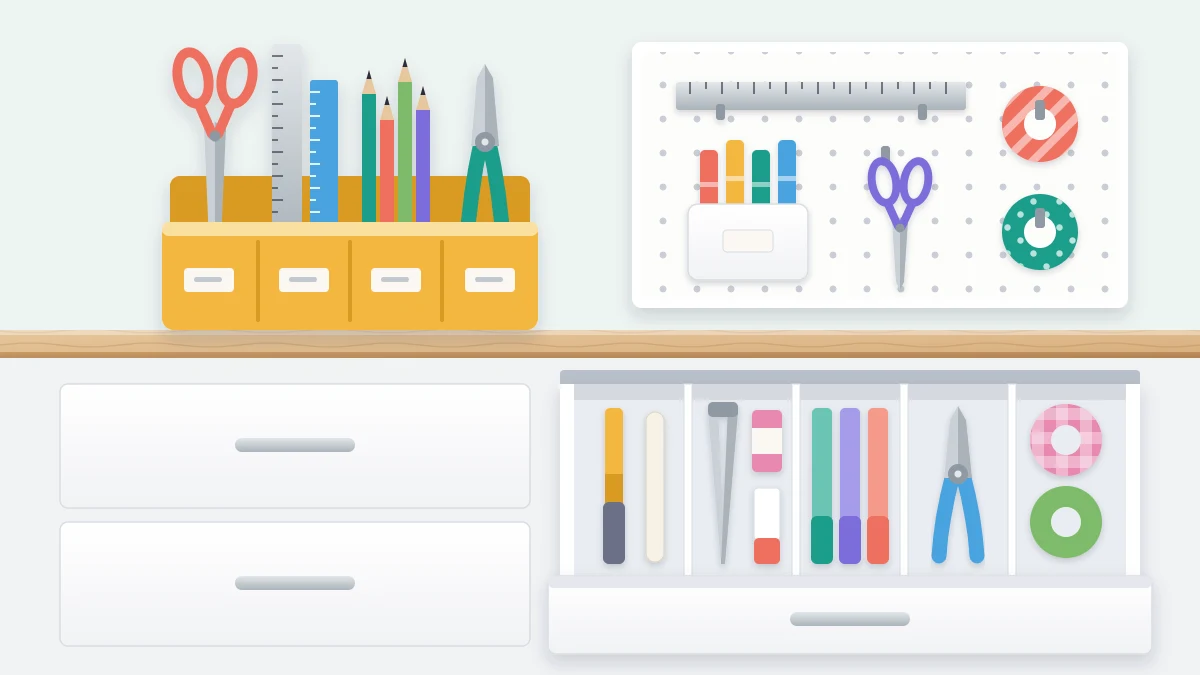
Ten minutes of hunting for the good scissors, then the metal ruler, then the pliers that were definitely on the table yesterday: that is how a lot of craft sessions begin. The tools are not lost. They simply have no fixed place, or their place is harder to reach than the nearest flat surface.
Craft tool organization works when it follows your hands rather than your hobbies. Sort tools by how often you pick them up, give the most-used ones the easiest spots, and make every home so obvious that an empty one is noticed at a glance.
Sort by frequency, not by craft
The usual instinct is one box per craft: sewing tools here, paper tools there. It fails because the tools you use in every craft, such as scissors, a ruler, a pencil and tweezers, end up buried in whichever box was opened last.
Instead, lay all your tools on a table and ask one question of each: when did I last use this? Then make three groups.
| Group | Typical tools | Where it lives |
|---|---|---|
| Everyday (most sessions) | Paper scissors, ruler, pencil, eraser, bone folder, tweezers, tape measure | Desktop caddy or top drawer, within arm’s reach of your seat |
| Weekly | Pliers, hole punches, cutting mat, stapler, clamps, seam ripper, glue gun | Wall panel or cart, one step away |
| Rare (a few times a year) | Eyelet setter, specialty punches, large stencils, tools for a craft you do seasonally | Labeled box on a high or low shelf |
Be honest about the everyday group. It is usually only eight to twelve tools, and keeping it that small is what makes it fast. The same reach logic applies to the whole room; the guide to planning craft room zones shows how to place furniture around it.
Everyday tools: a caddy or the top drawer
Everyday tools should be reachable without standing up. Choose between two homes according to your work surface.
- A desktop caddy suits a table that stays set up. Use one with separate upright compartments, so each tool has its own slot rather than a shared cup. Tall tools go at the back, short ones at the front, and nothing is stacked.
- The top drawer suits a table that has to be cleared. Line it with a non-slip mat and add dividers so tools lie in a single layer, each in its own channel. A cutlery tray is a ready-made divider; so are shallow boxes and lids cut to fit.
Either way, apply a single-layer rule. If one tool has to be lifted to reach another, the home is overfull, and something in it belongs in the weekly group. Brushes are the exception to the shared caddy: they need their bristles protected, as explained in the guide to storing paint brushes.
Weekly tools: a wall panel or a cart
Weekly tools need to be visible but not underfoot. A pegboard or other wall panel above or beside the desk shows every tool at once and keeps the surface clear. Hang the tools you use most between shoulder and eye height and heavier ones lower down. Layout and accessories are covered in these pegboard planning ideas.
If you rent, or the wall is not available, use one tier of a rolling cart with cups and a shallow tray, or a freestanding panel on the desk.
Safety note
When you mount a pegboard, rail or wall panel, follow the manufacturer’s instructions, fix it into wall studs or use anchors suited to your wall type, and stay within the stated weight limit.
Rare tools: one labeled box each
Tools you use a few times a year can live high, low or at the back, as long as you can find them without opening five boxes. Group them by job, such as “eyelets and setters” or “embossing tools”, and give each group a lidded box with a clear label on the front face.
Keep each tool’s small parts with it. Spare tips, keys, dies and instructions go in a zip bag inside the same box.
One home per tool, and make a gap obvious
A tool with two possible places has no place. Decide a single home for each one and make it specific: not “the drawer”, but “the second channel from the left”.
Then make absence visible, so a missing tool is noticed while you still remember where you used it:
- Outlines. Trace each tool on the drawer liner or on paper behind a wall panel with a marker. An empty outline is hard to ignore.
- Dedicated slots. A caddy with one compartment per tool, or a foam liner cut to each tool’s shape, does the same job.
- Color. A band of colored tape on the handle of every tool from one zone shows at once when a tool has wandered.
Finish each session by filling the gaps.
Duplicate the cheapest everyday tools
Some tools are needed in more than one zone: scissors at the cutting table and at the desk, a pencil and a tape measure almost everywhere. Carrying one pair around is how tools get stranded.
For inexpensive basics, keep a duplicate in each zone where the tool is used, and mark each with that zone’s tape color so it goes back to the right spot. Do not duplicate costly or specialist tools; give those one home at the zone where they are used most.
Sharp tools: closed, capped and apart
Sharp tools need a home that protects both your hands and their edges. Scissors are stored closed. A craft knife is stored capped or with its blade retracted, and a rotary cutter with its guard closed, each in its own slot or tray and never loose among other supplies. If children or pets use the room, keep sharp tools on a high shelf or in a lockable box.
Holders, hooks, blade disposal and edge protection are covered in full in the guide on storing scissors, craft knives and rotary cutters safely.
Cords, chargers and powered tools
Powered tools bring cables that tangle with everything nearby. Give all cords and chargers one bin, and make each cable identifiable.
- Coil each cord loosely and hold it with a hook-and-loop tie or a clip.
- Tag both ends with the name of the tool it belongs to.
- Keep batteries, chargers and spare tips in small labeled zip bags inside the same bin.
- Let a glue gun or heat tool cool fully on its stand before it goes back, with the cord loosely coiled beside it.
Store the cord bin near the outlet you use most, so charging happens in one place.
Frequently asked questions
How do I decide which craft tools stay on the desk?
Keep only the tools you use in most sessions, which for many people is eight to twelve items such as scissors, a ruler, a pencil and tweezers. Anything used about once a week moves to a wall panel or cart, and seasonal tools go into labeled boxes.
Is it better to store craft tools in a drawer or on the wall?
Use both for different jobs. A divided top drawer or a caddy suits small everyday tools you grab without looking. A wall panel suits weekly tools you want to see at a glance and keeps the work surface clear. Renters can use a cart tier or a freestanding panel instead.
How can I stop tools from wandering around the craft room?
Give each tool one specific home and make an empty home obvious with traced outlines, dedicated slots or shaped foam. Mark handles with a zone color, keep inexpensive duplicates where they are needed, and end each session by returning tools until every gap is filled.