Craft Closet Organization: Turn One Closet Into a Craft Station
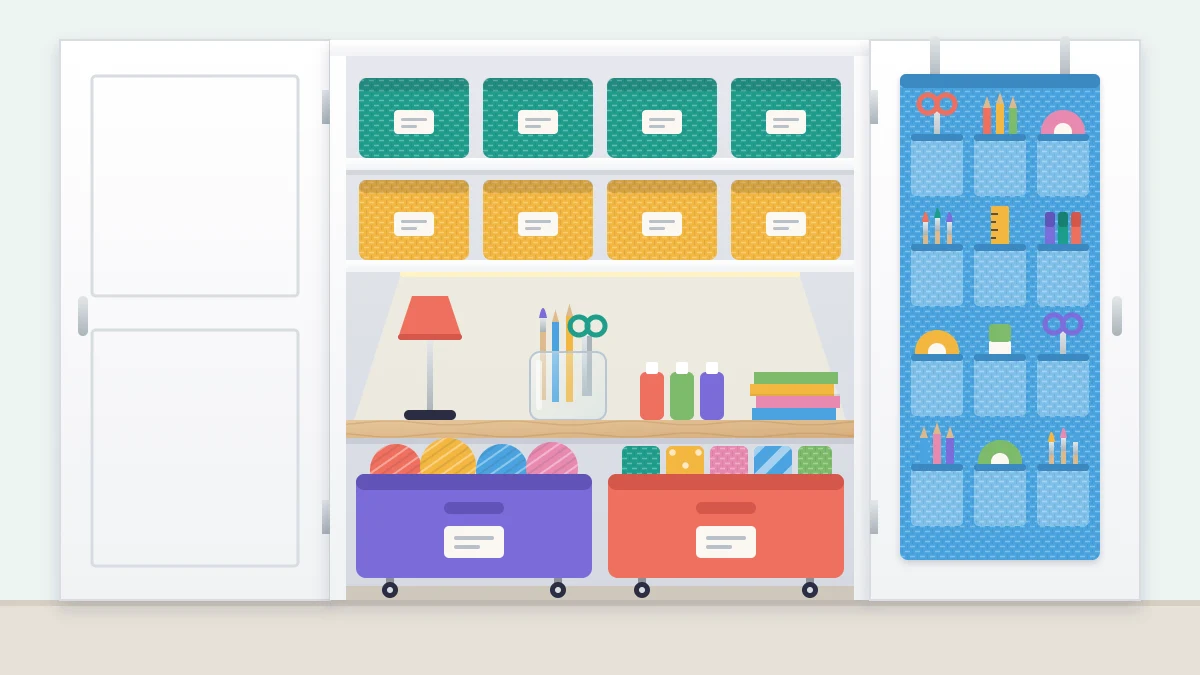
Turn a reach-in closet into a craft station in six steps: measure it, divide the height into three bands, add shelves, fit an optional work surface, use the door, and label matching bins.
At a glance
What you need
- Tape measure, paper and pencil
- Freestanding or adjustable shelving
- Matching bins in one or two sizes
- Lidded boxes for the top shelf
- Rolling bins for the floor
- Over-door pocket organizer
- Blank labels and a marker
You do not need a spare room to have a craft station. An ordinary reach-in closet, about 24 in (60 cm) deep and a few feet wide, has enough volume for a full stash and often a small work surface, and it has one feature no open corner offers: a door that hides everything when you are done.
Craft closet organization works when the closet is planned in horizontal bands by height, instead of being filled from the floor up. The steps below go from measuring to labeling, with the work surface as an optional extra.
Step 1: Measure the closet, including the door
Empty the closet completely, then write down:
- Inside width, depth and height. Measure width at the back wall and at the front, since closets are rarely square.
- The door opening. It is usually narrower than the interior. Anything that rolls or slides out must fit through the opening, not just inside the closet.
- Door type and swing. A hinged door can carry an organizer on its back. Sliding and bifold doors cannot, and they block part of the opening when open.
- What is fixed: the rod, the existing shelf and its height, and the nearest power outlet.
Sketch the front view on paper with these numbers on it. Every later decision gets checked against the sketch.
Step 2: Divide the height into three bands
Sort your supplies by weight and by how often you use them before deciding where anything goes. Then assign each group to a band.
- Top band, above eye level: light items you rarely need. Seasonal supplies, batting, spare packaging, finished pieces waiting to be given away. Use lidded boxes you can lift down with one hand.
- Middle band, waist to eye level: everyday bins. This is the easiest height to reach and see, so it goes to the supplies you use most weeks.
- Bottom band, floor to waist: heavy and bulky items. Paper reams, machines in their cases, large bottles and bulk refills sit on the lowest shelf or in rolling bins on the floor.
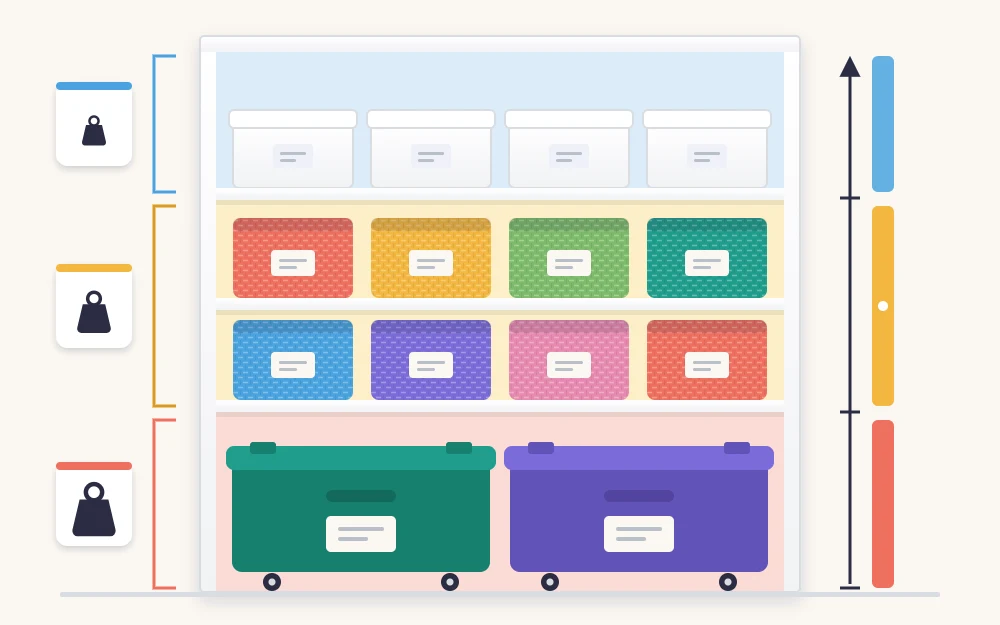
If you find you have more “everyday” supplies than middle band, that is the signal to cut back or to move a craft you do less often to the top.
Step 3: Fit shelves to the bands
A single shelf and a rod waste most of a closet. You have three ways to add levels, from least to most work.
- Freestanding units. A cube shelf or a narrow bookcase slides in with no drilling. Measure it against the door opening first. Tall units are anchored to the wall as their manufacturer directs.
- A hanging organizer on the rod. Fabric shelves that hang from the existing rod suit soft, light supplies such as yarn or folded fabric. Do not load them with paper or bottles. For fabric, fold pieces to one width first so the edges show, as described in the guide on how to store fabric.
- Adjustable wall shelving. Tracks with movable brackets let you set shelf heights to your containers and change them later.
Whichever you choose, set shelf spacing by the container: its height plus about 2 in (5 cm) of clearance to lift it out. Shelves about 12 to 16 in (30 to 40 cm) deep work better than full-depth ones, because nothing gets lost behind a front row.
Safety note
Install wall shelving and tracks as the manufacturer’s instructions describe, fixed into studs or with anchors suited to your wall type, and keep each shelf within its stated weight limit. Put the heaviest items on the lowest shelves, and check that the closet rod is secure before hanging anything from it.
Step 4: Add a work surface, if the closet allows
A closet at least 36 in (90 cm) wide can usually take a shelf at desk height, roughly 28 to 30 in (71 to 76 cm) from the floor, deep enough to work on. Aim for about 16 to 20 in (40 to 50 cm) of depth and leave the space beneath it open for your knees and a stool that tucks in.
A work shelf carries more than a storage shelf, because you lean on it. Choose hardware its manufacturer describes as suitable for a work surface and mount it by the same rules as any other shelf. If you would rather not drill, a narrow table or a top resting on two low drawer units does the same job.
Closets are dark, so add a light: a rechargeable stick-on light under the shelf above, or a small clamp lamp. Route any cord so the door cannot pinch it.
Step 5: Use the back of the door
On a hinged door, an over-door pocket organizer holds the small tools and supplies you want at eye level: pens, glue sticks, tape, rulers, scissors stored closed. Keep craft knives capped or retracted, and if children use the room, move sharp tools to a lidded box on the top shelf instead.
Before filling it, close the door and look at the gap between the door and the shelf fronts. Filled pockets need a few inches. If the shelves come right to the door frame, use flat hooks or a slim rack instead of deep pockets.
Step 6: Choose uniform containers and label the fronts
A closet is viewed from one direction only, so the front face of each container is all you see. Two choices make that view useful.
First, use one or two container sizes across the whole middle band, so bins sit edge to edge and can swap places. The guide to craft storage containers compares clear boxes, fabric bins and drawers if you are deciding which type to use. Fill each bin to just below the rim and no higher.
Second, put a label on the front of every container, in the same position on each one. How to word them is covered in the guide to craft supply labels.
Scaling up or down
For a small stash, skip the work shelf and use half the closet, leaving the rod on one side for clothes or coats. For a large one, keep only active supplies in the closet and move bulk and off-season boxes elsewhere. Either way, leave one bin empty. A closet filled to the last inch has nowhere to put the next purchase, and the floor becomes the overflow. More ways to stretch a tight space are collected in these small craft room ideas.
Frequently asked questions
How deep does a closet need to be for a craft station?
A standard reach-in closet of about 24 inches deep is enough for storage and a shallow work shelf. For storage alone, shallower closets work too, since shelves of 12 to 16 inches deep are easier to use than deep ones. Width matters more for a work surface than depth does.
Can I put a desk inside a closet?
Often, yes. A shelf at desk height or a narrow table fits most closets that are about three feet wide or more. Leave knee space beneath it, add a light, and plan where a stool will go when the door is closed. A wall-mounted work shelf must be installed as its manufacturer directs.
What should go on the top shelf of a craft closet?
Light items you seldom need, such as seasonal supplies, batting, gift packaging and finished pieces. Use lidded boxes that you can lift down easily with one hand and label the fronts. Keep heavy things off the top shelf, since lifting weight down from above head height is awkward.