Craft Cart Organization: How to Set Up a Rolling Cart
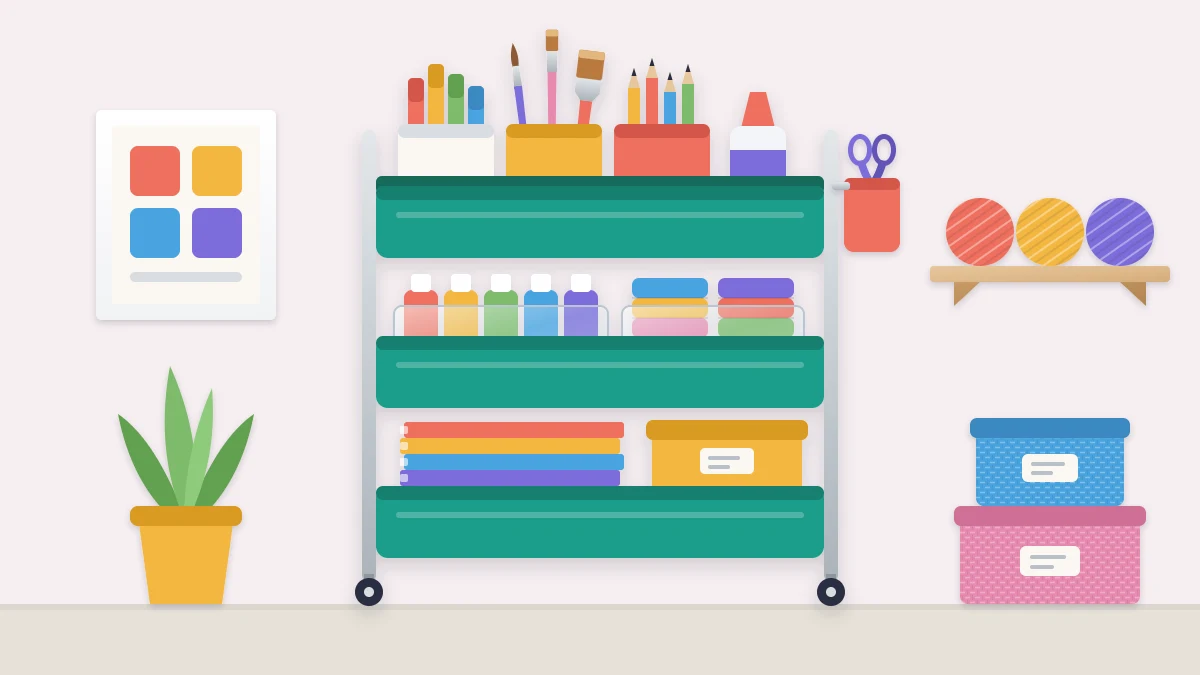
Give a three-tier rolling cart one clear job, then load it tier by tier: tools on top, divided supplies in the middle, heavy items at the bottom, and a two-minute reset before it is parked.
At a glance
What you need
- Three-tier rolling cart
- Cups or jars for upright tools
- Small lift-out containers or cut-down boxes
- One large bin for the bottom tier
- A bookend or magazine file
- A tie-on tag and marker
A three-tier rolling cart turns into a dumping ground for one reason: nobody told it what it was for. With no assigned job, it accepts everything, and within a few weeks the top tier is a heap and the bottom tier is a mystery. Craft cart organization is mostly a matter of giving the cart a single job and loading each tier to match.
The setup below takes about an hour, including emptying the cart. You will need the cart, a clear table, and a few small containers you can test before buying anything new.
Step 1: Give the cart one job
Choose one of these three roles. A cart that tries to do two will slide back into a heap.
- Current-project station. The cart holds only what the project on your table needs. When the project changes, the cart is emptied and reloaded. Best if you switch between crafts.
- Single-craft station. Everything for one craft, such as painting, card making or knitting, lives on the cart permanently. Best if one craft makes up most of your time.
- Shared-supplies cart. The basics several people use: scissors, glue, tape, markers, paper. Best for a family table. If this is your situation, the guide to organizing a shared craft space explains how to set rules around it.
Write the job on a tag and tie it to the handle. It gives you a test for every item: does this belong to the cart’s job?
Step 2: Empty it and measure the tiers
Take everything off and sort it into three piles: belongs to the cart’s job, belongs elsewhere in the room, and should leave the house. Only the first pile goes back.
Then measure the inside of one tier: length, width and the depth of the rim. Many three-tier carts have trays roughly 16 by 10 in (40 by 25 cm) and about 3 in (8 cm) deep, but check yours, because the rounded corners take away usable space. Note the clear height between tiers as well. That gap decides how tall a bottle or cup can be on the lower two levels.
Step 3: Load the top tier with tools
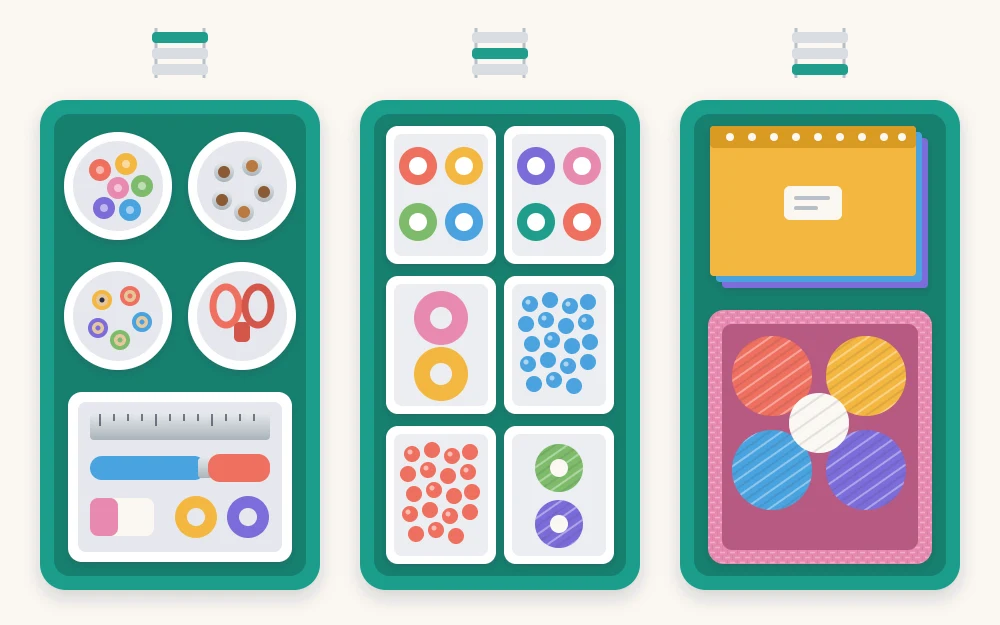
The top tier is the only one you can see into fully and reach without bending, so it gets the things you pick up most often. Stand tools upright in cups or jars, grouped by kind: one for pens and pencils, one for brushes, one for scissors (stored closed, points down) and rulers.
Add one small caddy or tray for the handful of items you carry to the table every session. A craft knife belongs here only with its cap on or its blade retracted, in a cup of its own. Leave about a third of the top tier empty. That space is the landing spot for whatever you are holding when the phone rings.
Step 4: Divide the middle tier for supplies
The middle tier holds consumables: paint bottles, ink pads, tape, glue sticks, small skeins, embellishments. Loose on the tray, these mix within days. Divide the tier into a grid of small containers, each holding one kind of thing.
Choose containers that:
- are no taller than the rim plus about 1 in (2.5 cm), so nothing catches the tier above;
- fit side by side with little wasted space (two or three that fill the length are better than five odd sizes);
- lift out with one hand, so you can carry a whole container of paint or tape to the table and bring it back in one move.
Shoebox lids, cut-down cereal boxes and clean food tubs make good test containers. Use them for a couple of weeks before buying matching ones. If you do buy, the guide to choosing craft storage containers covers sizes and types.
Step 5: Put weight and bulk on the bottom
The bottom tier takes the heaviest and bulkiest items: paper pads, a stack of sketchbooks, a large bottle of glue, a box of refills, a bin of yarn for the current project. Weight carried low keeps the cart steady when it rolls. Weight carried high makes it prone to tipping when a wheel catches a rug edge.
Stand flat items on edge against one end, held by a bookend or a magazine file, and give the rest of the tier to one large bin. Nothing on any tier should stick out past the rim, where it can catch on furniture as the cart moves.
Step 6: Use the rim, sparingly
The rim and side panels add storage without using tray space. Clip-on cups hold the two or three tools you want closest. S-hooks or magnetic hooks on the side carry a roll of tape, a small bag for scraps and trash, or a cloth. Hang light things only, and keep them on the side that faces away from your legs. A cart with something dangling from every edge is harder to roll and harder to park.
Step 7: Choose a parking spot and a reset rule
A cart needs two positions. Its working position is beside your dominant hand, close enough to reach the top tier from your chair. Its parking spot is out of the walkway: under the table, in a closet, or in the gap beside a shelf unit. Measure the parking spot before you commit, including the handle. In a tight room, the cart’s ability to roll out of the way is the whole point, as the collection of small craft room ideas explains.
The rule that keeps it working is short: the cart is reset before it is parked. Tools back in their cups, lids on, containers back in their grid, anything that does not belong to the cart’s job carried to its real home. This takes about two minutes when done every session.
Tip
If the same stray item lands on the cart three sessions in a row, it is telling you something. Either it belongs to the cart’s job and needs a container, or its real home is too far away.
Adapting the setup
For a small collection, one cart can serve as your entire storage for a craft: follow the single-craft plan and resist filling empty space. For a large stash, the cart should hold only a working selection, perhaps a dozen paint colors or the yarn for one project, while the bulk stays on shelves. Restock the cart from the shelves when you reset it, and send back whatever you have stopped using.
Frequently asked questions
What should go on each tier of a craft cart?
Put the tools you pick up most on the top tier, standing in cups. Use the middle tier for consumable supplies in small divided containers that lift out. Keep the bottom tier for heavy and bulky things such as paper pads and large bottles, which helps the cart stay steady as it rolls.
How do I stop my craft cart from becoming a dumping ground?
Assign it one job, such as holding the current project or one craft, and remove anything that does not serve that job. Then reset the cart before parking it after each session: tools back in cups, containers back in place, strays returned to their real homes.
Is one rolling cart enough storage for a craft?
For a small collection, often yes, especially for a craft with compact supplies such as hand lettering or card making. For a larger stash, treat the cart as a working station that holds a selection, and keep the bulk on shelves or in a closet where you can restock from it.